First you need to setup a Linqer Connection.
The Linqer Connection Pool screen pops up, when you run program first time.
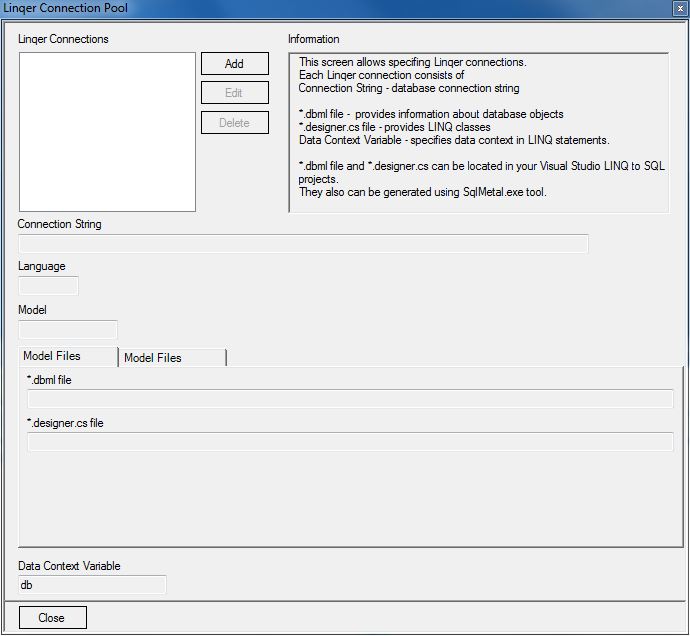
Click "Add" button to create a new Linqer Connection.

Specify a connection name (for example Northwind).
Specify a connection string to connect to a SQL Server database.
If you already have a Visual Studio project with LINQ to SQL classes, you can specify paths for *.dml and *.designer.cs files. You can also generate these files using the SqlMetal tool by clicking the "Generate LINQ to SQL Files" button.
Specify a Data Context Variable, which can be used in the produced LINQ statements.
As soon as you setup a Linqer Connection you can convert SQL to LINQ.
You can have more than one Linqer connection and pick the active one from the connection list on the main toolbar.

You can type, paste, or load an SQL statement from file into the SQL window.
Click F5 or use convert this button ![]() to produce a LINQ statement.
to produce a LINQ statement.

Click F7 or use Run button ![]() to compile and execute LINQ statement.
to compile and execute LINQ statement.
The query result appears on the bottom section of the screen.
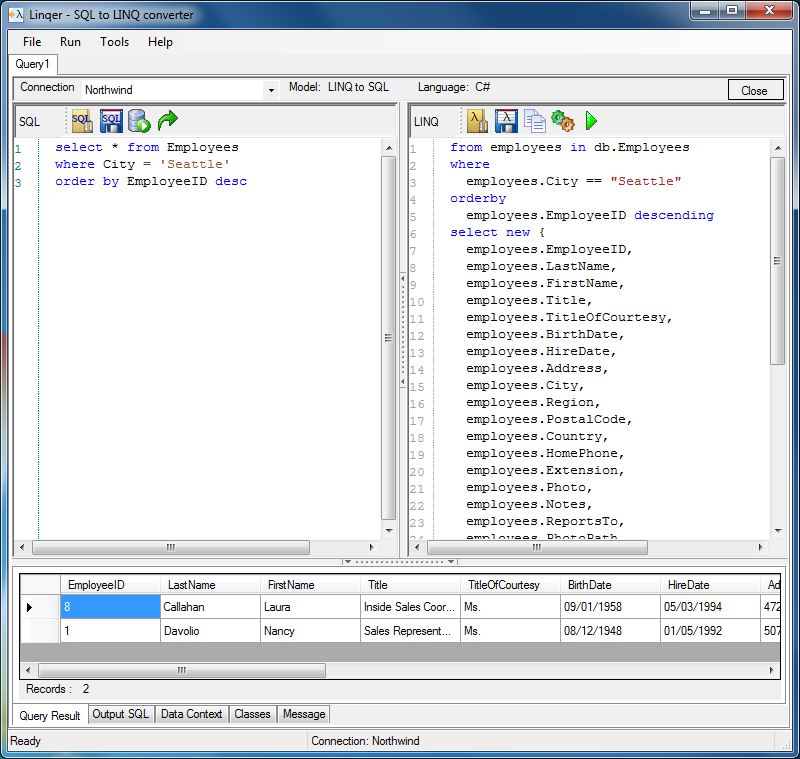
You can compare the output SQL, which has been produced by the .NET with the original SQL statement.

The code for DataContext variable declaration can be obtained in the Data Context section.

Click F6 to or use the "Compile" button ![]() , when you do not want to run a LINQ statement but want to make sure it is valid.
, when you do not want to run a LINQ statement but want to make sure it is valid.
Use the "Copy to Clipboard" button  to move the generated LINQ expression into your Visual Studio project.
Use generated classes, which turn your query result into the convenient list.

Use the  button to replace class names. The "Copy to Clipboard" button - helps you move generated classes into your Visual Studio project.